
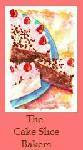
This was such a fun cake to make! I opted for the Hot Chocolate version. Other than my whipped cream being a little soft, it turned out well. I have loved seeing all of the different cakes made by other Cake Slice Bakers, everyone is so creative. I think this is going to be great fun! Check out The Cake Slice Bakers!
Hot Chocolate Chiffon Cake
Makes an 8-inch triple layer cake
1/4 c. of neutral oil (ie. vegetable, canola, or soybean)
6 eggs separated
6 T. strong hot chocolate
2 t. of vanilla extract
1 and 1/3 c. of cake flour*
1 and 1/2 c. of sugar
1 t. of baking powder
1/2 t. of ground cinnamon
1/2 t. of salt
1/2 t. of cream of tartar
Cocoa powder or cinnamon for dusting
(*The recipe calls for cake flour and if you only have all-purpose flour on hand, you can substitute 3/4 cup (105 grams) all purpose flour plus 2 tablespoons (30 grams) cornstarch.)
Hot Chocolate Syrup
8 oz. hot water
2 T. Cocoa powder
2 T. sugar
Vanilla Whipped Cream
3 c. of heavy cream
1/3 c. of sugar
2 t. of vanilla
1. Preheat the oven to 350F degrees. Line the bottom s of three 8-inch round cake pans with parchment paper but do not grease.
2. In a medium bowl, combine the oil, egg yolks, espresso, and vanilla; whisk lightly to blend. In a large mixing bowl, sift together the flour, 1 cup of sugar, the baking powder, cinnamon, and salt. Set aside.
3. In the large bowl of an electric mixer, whip the egg whites with the cream of tartar on medium-low speed until frothy. Raise the mixer to medium high and gradually add the remaining 1/2 cup of sugar. Continue to beat until soft peaks form. Do not whip to stiff peaks or the cake will shrink upon cooling.
4. Add the espresso-egg mixture to the dry ingredients and fold together just until combined. Add one fourth of the egg whites and fold them gently into the batter. Fold in the remaining egg whites just until no streaks remain. Divide the batter among the pans.
5. Bake the cakes for 18 minutes or until a cake tester comes out clean. Allow the cakes to cool completely in the pans. Once cooled run a knife around the edge of the pans to release the cakes. Invert onto a wire rack and remove the parchment papers.
6. To assemble the cake, place one cake layer flat side up on a cake stand or platter. Soak the cake with 1/3 cup of the hot chocolate syrup. Spread 1 and 1/3 cups of whipped cream evenly over the top of the cake. Repeat with the next layer the same steps. Finally top with the third layer. Soak with syrup and frost the top and sides of the cake with the whipped cream.
7. To decorate the cake smooth out the whipped cream as much as possible on top. Lay a paper doily on top and sift cocoa powder or cinnamon over the doily to reveal a lacy detail.


8 comments:
I really like the Hot Chocolate version, a must try next time I bake this cake. Your cake looks really good and the runny frosting adds to its appeal :)
Rosie x
Looks yummy- I am sure you will love it! We really liked the Hot Chocolate/Cocoa version!
I love seeing all the different versions of the recipe! How exciting! Looks great!
Will try it make this again, hot chocolate style. Your cake looks great!
Your cake looks great. I love how tall it turned out.
Wonderful job! It looks great!
Cake look wonderful. Chocolate is always better than Cappuccino. This is one group I may HAVE to join since I already have the book Very nice job.
This looks amazing!
Post a Comment